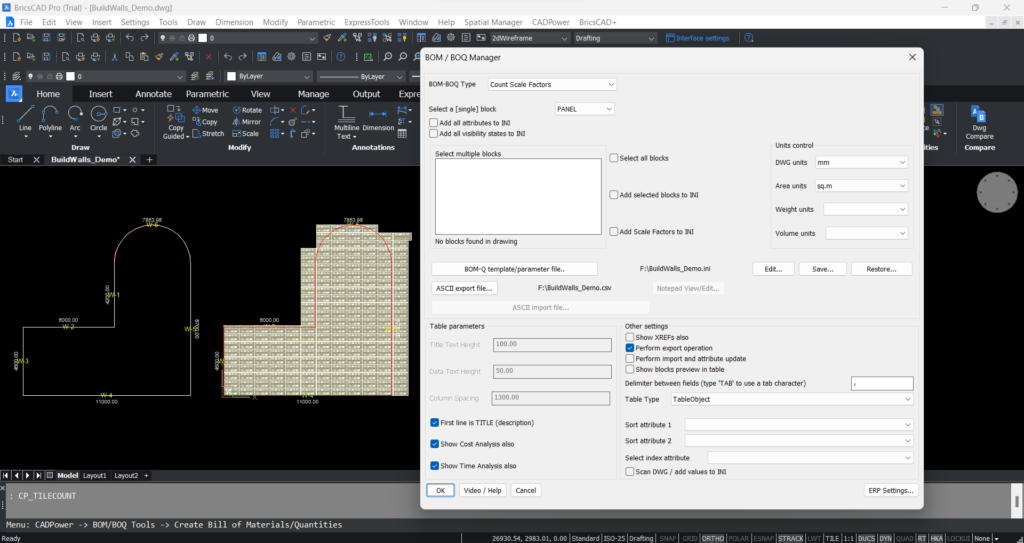
The first thing you need to make sure is if the BOM/BOQ Type is selected correctly. It must be set as ‘Count Scale Factors’. Please be aware that the CP_TILECOUNT command is part of our larger BOM-BOQ toolset and the interface is shared and common. There are other BOM/BOQ Types possible but we need to select the ‘Count Scale Factor’ workflow here.
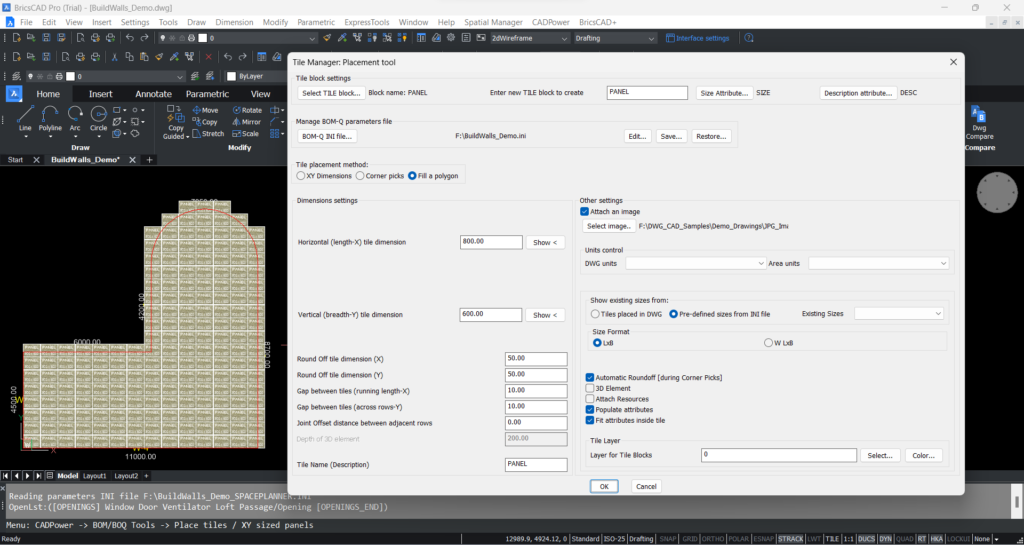
The next thing you need to do is to select your tile block name. Do so from the drop-down list labeled ‘Select a [single] block’
Some important parameters to note:
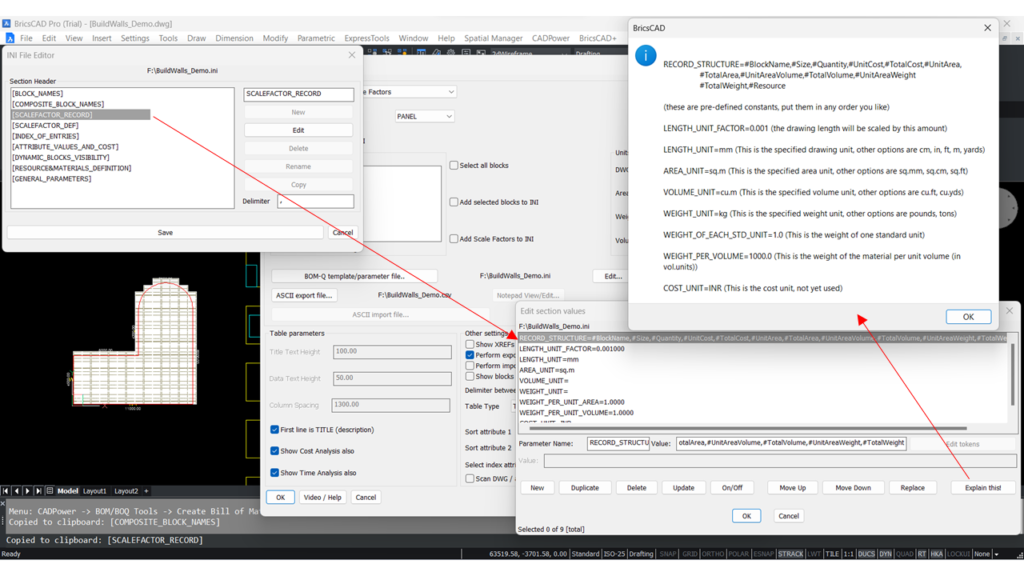
By default, if these options are left blank, the actual area from drawing units are taken. If the ‘Drawing Units’ and ‘Area Units’ are specified, the reporting area units are converted accordingly. For example, you may like to place the panels with a size of 1000mm X 600mm, but you would like the final area report to be in sq.m. In such situations, you can set these parameters appropriately.
- Show cost analysis also
- Show time analysis also
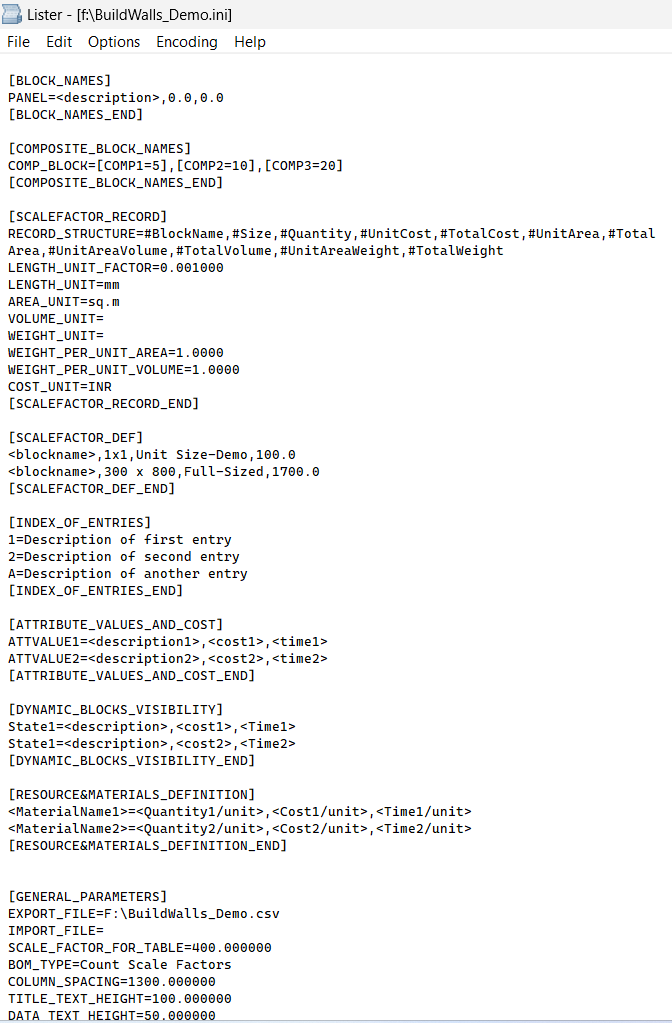
You can enable cost and time analysis provided you have specified the per-unit-area cost and per-unit-area time in the INI file. Checking these options includes the time and cost parameters in the output table and CSV file.
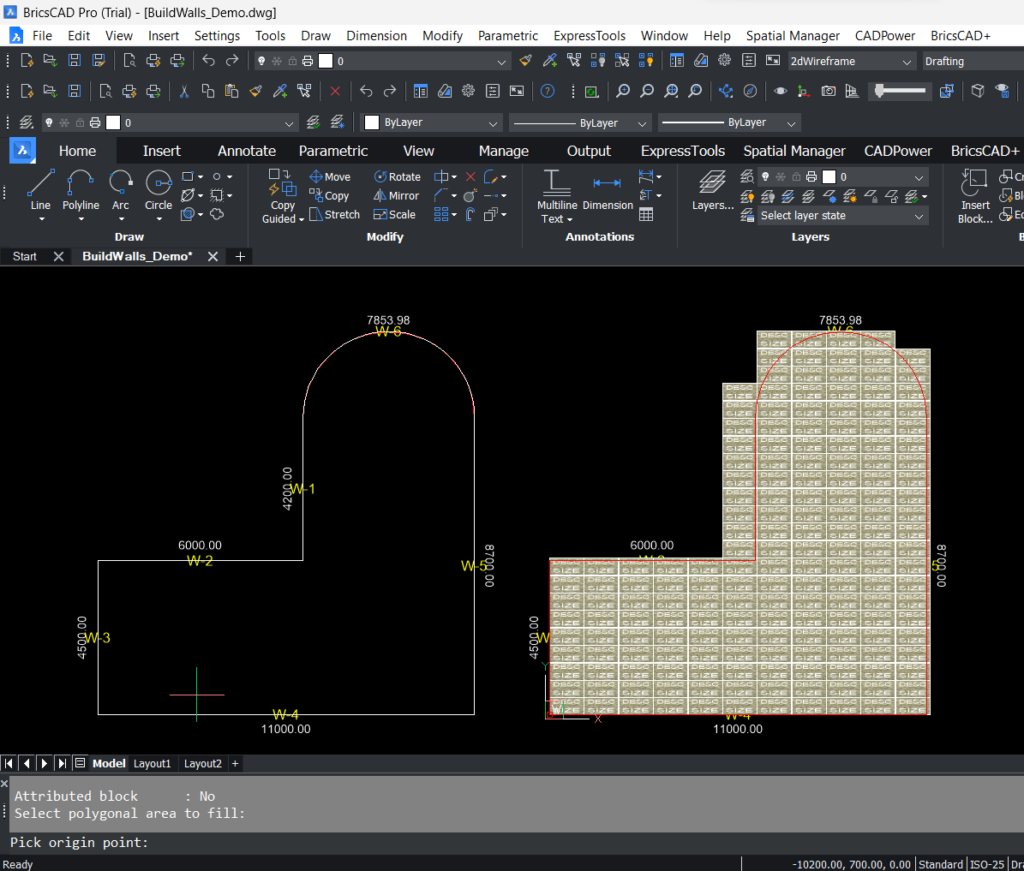
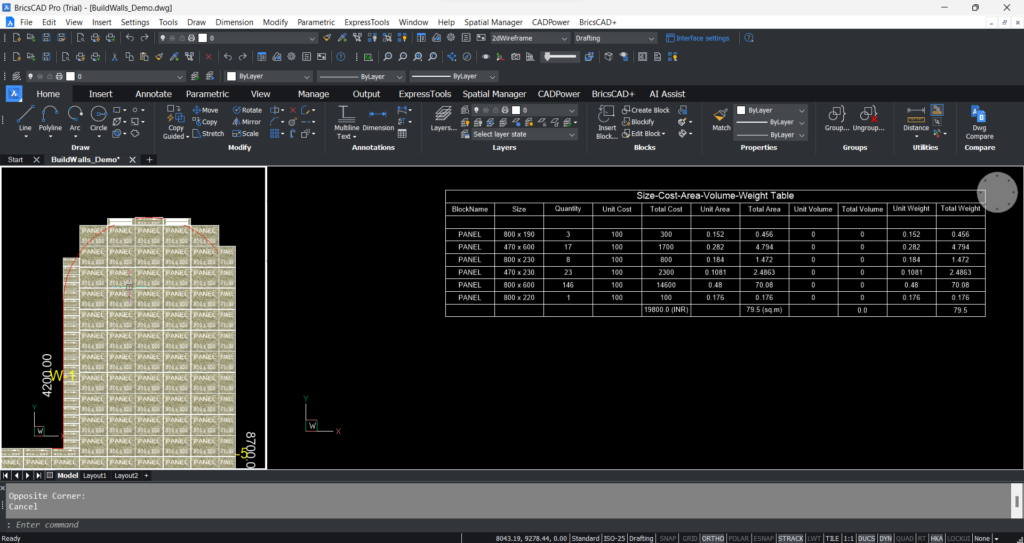
Once the tiles have all been placed and edited to size, the next task is to count them. This is the quantity estimation part. CADPower can not only count the quantity but also give you estimates of cost, time, surface area, weight and volume.
You also have the ability to specify different reporting units for area compared to the linear units. In other words, you can perform a units conversion while reporting the area.
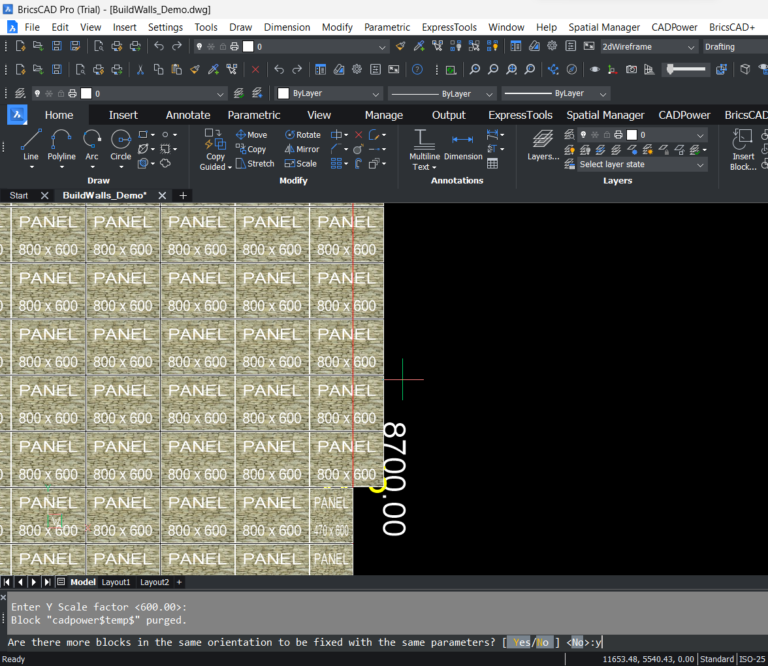
Upon starting the CP_TILECOUNT command, you will be presented with the dialog box as shown above. They can be of different scale factors (sizes) as edited by the CP_TILEEDIT and CP_SCLEDIT commands that we described above.
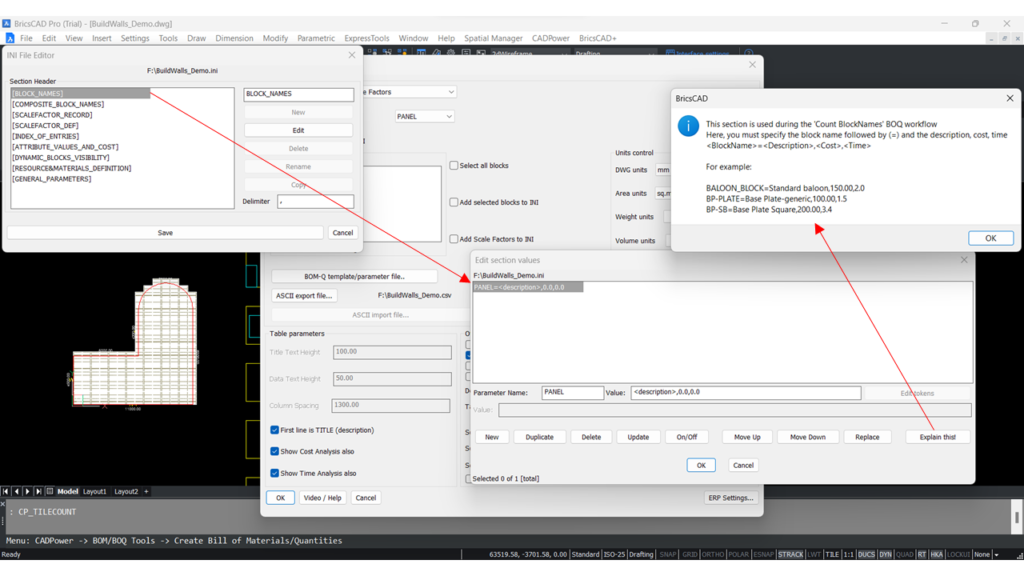
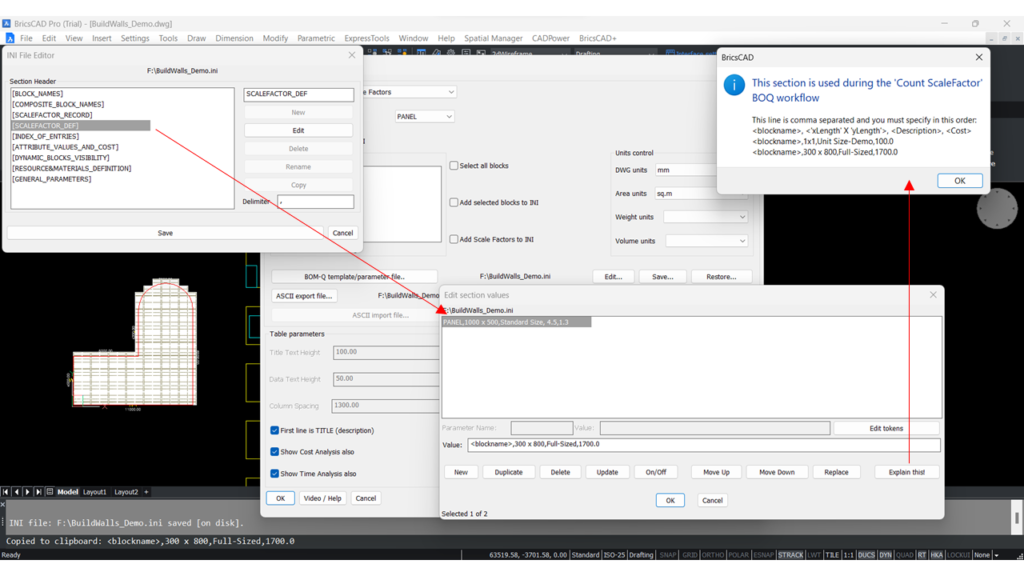
In the main dialog box, you can click on the option ‘Add Scale factors to INI’. This will scan your drawing and add the unique scale factors of all the tile blocks in your current drawing.
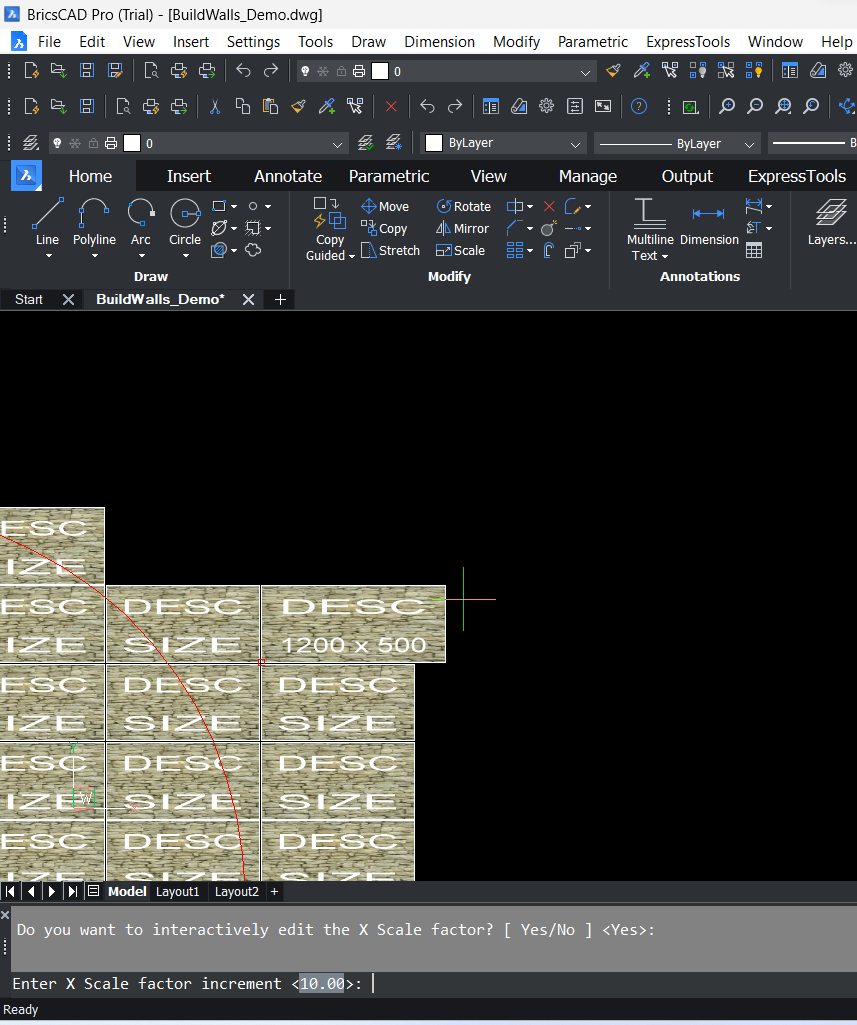
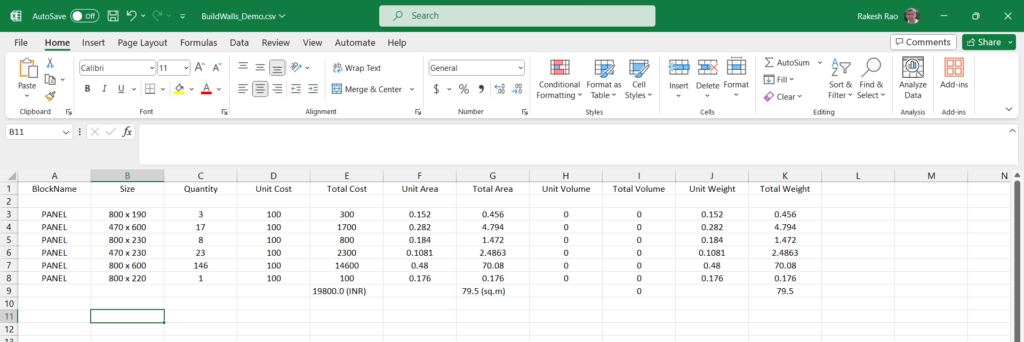
Upon clicking Ok and selecting the panel blocks, the table is generated as shown in the picture below. A CSV file is also created as shown in the below picture. This enables easy creation of quantity takeoff data from CAD to Excel.
If cost, time and weight/volume information is given correctly in the INI file, the same is captured and displayed in the CAD table as well as the CSV file.